Few questions

Questions and postings pertaining to the usage of ImageMagick regardless of the interface. This includes the command-line utilities, as well as the C and C++ APIs. Usage questions are like "How do I use ImageMagick to create drop shadows?".
User avatar
fmw42
Posts: 25562
Joined: 2007-07-02T17:14:51-07:00
Authentication code: 1152
Location: Sunnyvale, California, USA

Re: Few questions

Post by fmw42 »

convert rose_thresholed.png -negate -edge 1 rose_t90_.png
Try removing the -negate. That should reverse the edges.

Or with -morphology you can specify edgein or edgeout
VanGog
Posts: 308
Joined: 2012-02-05T02:46:58-07:00
Authentication code: 8675308

Re: Few questions

Post by VanGog »

Yep, yet I tried the Laplacian positives and it also works. I think the edge command could be faster.

PbmPlus / NetPBM method is not much clear to me. But I saw some numbers there like in PS custom filter.
http://forensicphotoshop.blogspot.com/2 ... ained.html
Does is work similar?

to the point 4) Instead using grid, in PS, I tried to do something like this:
http://i48.tinypic.com/fcqlnm.png
or this http://image.shutterstock.com/display_p ... 318366.jpg
I created white arrows, applied edges, and then applied custom filter:
-2 -1 -2
-1 9 -2
-2 -1 -2

Which resulted in the result as shown. Actually not much succeed what I wanted to do, but a bit similar. As I would like to get something close to the 2nd arrow from top, but having just cca 1x1 or 2x2 px white dots and between them should be 10 px or 12 px black space.

Maybe the PbmPlus / NetPBM method could do that? Actually I want to create a mask to emulate light yellow tones of lamp lights one the road:
http://image.shutterstock.com/display_p ... 561926.jpg
or this
http://image.shutterstock.com/display_p ... 318366.jpg
(this is close look, but I work with much less detail more similar to this http://photopostsblog.com/wp-content/up ... night5.jpg)
User avatar
fmw42
Posts: 25562
Joined: 2007-07-02T17:14:51-07:00
Authentication code: 1152
Location: Sunnyvale, California, USA

Re: Few questions

Post by fmw42 »

3) Then I want to make relief (is it right word?) to get only the edges of the selection. Therefor I look for filter function like in PS - its called "Glowing edges" under Filter/Style menu.
I have created a script called "edges" that works similar to Photoshop Glowing Edges. See the link below for the script.
VanGog
Posts: 308
Joined: 2012-02-05T02:46:58-07:00
Authentication code: 8675308

Re: Few questions

Post by VanGog »

I am back and concerned in creating night textures of city.

This nigh texture has been created in Photoshop (this one is zoomed, original is high resolution).
Image

I hope I could do it in ImageMagick.

It's still not so good like in the image here:
http://upload.wikimedia.org/wikipedia/c ... 007%29.jpg

Because it misses the light spots placed along the edges of routes.

Did ImageMagick improved/developped in some way that could help me to create the lights alone the routes? Some clever technique to find only those areas which are bigger than just few pixels and to apply the lights according the edges. Iong time I was not here so have to recall all things we discussed here before 2 years.
Werty
Posts: 66
Joined: 2010-08-06T05:37:36-07:00
Authentication code: 8675308

Re: Few questions

Post by Werty »

Look into morphology, read on from here and down..

http://www.imagemagick.org/Usage/morphology/#basic

The thinning, edgein, edgeout, is probably your best option.

/Edit, ohh, i see it was already mentioned back in 2012 :p
Windows 7 user
VanGog
Posts: 308
Joined: 2012-02-05T02:46:58-07:00
Authentication code: 8675308

Re: Few questions

Post by VanGog »

I looked for my old thread about creating night city textures and I thought it was this one. But no. The correct thread is there:

viewtopic.php?f=1&t=21104

I have found better way how to create more realistic texture in Photoshop so I will ask new question there.
VanGog
Posts: 308
Joined: 2012-02-05T02:46:58-07:00
Authentication code: 8675308

Re: Few questions

Post by VanGog »

I'm doing color corrections of aerial photo and I need to do some specific task. I have a mask of few pixels which hue I need to change. The pixels on route are wrong color (light green). But if I change the hue of pixel on route It also changes the hue of the grass. So I came with idea. Is it possible calculate the average color which is around the pixel - its position specified by mask - but from original image and change the color of the pixel to the average color? Calculate the color around the pixel defined by mask and replace the color to copy of original file.

Another need I have. Sometimes when removing shadows which are very dark and low saturated, I get bright area after I had brighter the pixels. There area lost colors details. I can turn them green to grass color, but that will not look as pixels on normal photo which are blured. What I need to do is to generate "grain effect", which is something like a "noise" or random colored pixels.

To show you what I did in Photoshop by grain effect:
Image
The white area is the part which was not defined by mask. The part which was in the mask contains randomly colored pixels. This is what I need to do before I can apply my special effect. This is the same image as we worked with it recently. In this image pixels which are red corespond to grass but that's not important.
The image generated above is based on this - genarated by effect texture/grain in Photoshop:
Image

I think I have generated the image above when I have selected the blured green area of grass with mask, and then genarated the blur effect. This gives me nice tool. Because I can blur it and then I use soft light effect to create new grass texture.

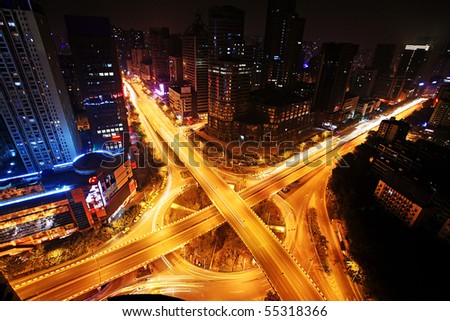
And this is the original image, how it looked before I applied the special effect using "grain" texture, blur and blend overlay blending.
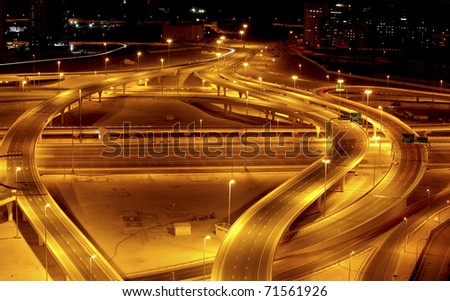
Before/After:
Image

Once more, less size:
Image
Post Reply