Only IM internal images end in a colon : remove the colon and just use image.png or image.jpg etc
If you are on windows, see http://www.imagemagick.org/Usage/windows/ as there are some difference between windows IM and unix IM command syntax and scripting.
How to create round corner and drop shadow by convert?
-
maitrebart
Re: How to create round corner and drop shadow by convert?
Bonzo wrote:Post your code.
I pressume you are not adding : to your image name ? This is only for built in Image Magick images.
Code: Select all
[...]
infile1="p_cotegaspesie5s.jpg"
infile2="../bkgd_photo.gif"
[...]Well the result is not what I expected. My background image is higher than taller and the main image is larger than higher.
So the end result not usable. I thought the background image would tile and crop to the output dimensions of the main image + the dropped shadow.
Anyway it seems it is much more difficult than I expected. I don't have a lot of images to process so I will proceed manually with Gimp.
Thank you very much for your help anyway. It was appreciated. You taught me more about IM.
-
fmw42

- Posts: 25562
- Joined: 2007-07-02T17:14:51-07:00
- Authentication code: 1152
- Location: Sunnyvale, California, USA
Re: How to create round corner and drop shadow by convert?
my example should work, but if you post links to your two input images, I can see if I overlooked something particular to your size and formats.
infile1 was the smaller of the two image and the one to get rounded corners and shadow. infile2 was the backgournd image overwhich to place the result from infile1.
infile1 was the smaller of the two image and the one to get rounded corners and shadow. infile2 was the backgournd image overwhich to place the result from infile1.
-
maitrebart
Re: How to create round corner and drop shadow by convert?
Here's the web page: http://www.maitrebart.net/exphotos/gasp ... spesie.htmfmw42 wrote:my example should work, but if you post links to your two input images, I can see if I overlooked something particular to your size and formats.
infile1 was the smaller of the two image and the one to get rounded corners and shadow. infile2 was the backgournd image overwhich to place the result from infile1.
There, are the results of my manipulations with Gimp.
The background image is: http://www.maitrebart.net/exphotos/bkgd_photo.gif
You can click on any small image on the web page, a lightbox will show up and you'll be able to right-click and save the image. Then you'll have to scale it down around 40 kpixels.
The scaled-down image and the background image (the input images) are the ones I normally work with manually to generate each of the small shadow-dropped images (the output image).
Also if you save one of the small shadow-dropped images, you'll see that I leave a background border all around. That is the final effect I would try to reach automatically with IM.
If you want to give a try I will be more than grateful, but you don't have to. I might be asking for something too complex. Note that in my case, I don't really need to the rounded corners.
-
fmw42
- Posts: 25562
- Joined: 2007-07-02T17:14:51-07:00
- Authentication code: 1152
- Location: Sunnyvale, California, USA
Re: How to create round corner and drop shadow by convert?
I downloaded one of your portrait mode (rather than landscape mode) images and your background and will experiment today or tomorrow. But I don't see any black border around the input image except for the shadow. Please clarify.
-
maitrebart
Re: How to create round corner and drop shadow by convert?
No, the border is not black. It is some spacing I leave using the background image (on the left and top sides) in order the picture does not align top-left.fmw42 wrote:[...] But I don't see any black border around the input image except for the shadow. Please clarify.
-
fmw42
- Posts: 25562
- Joined: 2007-07-02T17:14:51-07:00
- Authentication code: 1152
- Location: Sunnyvale, California, USA
Re: How to create round corner and drop shadow by convert?
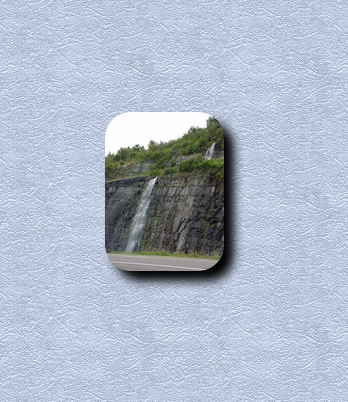
Still not sure what you mean. But here is using your images and an adjustment to the shadow parameters to make it darker and wider.maitrebart wrote:No, the border is not black. It is some spacing I leave using the background image (on the left and top sides) in order the picture does not align top-left.fmw42 wrote:[...] But I don't see any black border around the input image except for the shadow. Please clarify.
convert cotegaspesie4.jpg -resize 50% cotegaspesie4_sm.jpg
infile1="cotegaspesie4_sm.jpg"
infile2="bkgd_photo.gif"
ww=`convert $infile1 -ping -format "%w" info:`
hh=`convert $infile1 -ping -format "%h" info:`
wwm1=`convert xc: -format "%[fx:$ww-1]" info:`
hhm1=`convert xc: -format "%[fx:$hh-1]" info:`
convert $infile1 \
\( +clone -threshold "100%" -fill white -draw "roundrectangle 1,1 $wwm1,$hhm1 25,25" \) \
-alpha off -compose CopyOpacity -composite \
-background none -compose Over -gravity center -extent ${ww}x${hh} \
\( +clone -background black -shadow 100x5+10+10 \) +swap \
-background none -flatten $infile2 +swap -gravity center -composite \
cotegaspesie4_sm_rounded_bkgd.png
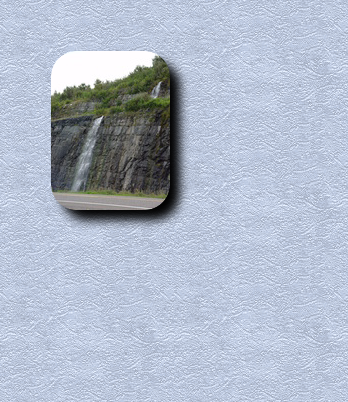
And you can place the rounded shadowed image anywhere you want relative to the top left corner of the background using a slight modification:
infile1="cotegaspesie4_sm.jpg"
infile2="bkgd_photo.gif"
ww=`convert $infile1 -ping -format "%w" info:`
hh=`convert $infile1 -ping -format "%h" info:`
wwm1=`convert xc: -format "%[fx:$ww-1]" info:`
hhm1=`convert xc: -format "%[fx:$hh-1]" info:`
xoff=50
yoff=50
convert $infile1 \
\( +clone -threshold "100%" -fill white -draw "roundrectangle 1,1 $wwm1,$hhm1 25,25" \) \
-alpha off -compose CopyOpacity -composite \
-background none -compose Over -gravity center -extent ${ww}x${hh} \
\( +clone -background black -shadow 100x5+10+10 \) +swap \
-background none -flatten $infile2 +swap -gravity northwest -geometry +${xoff}+${yoff} -composite \
cotegaspesie4_sm_rounded_bkgd2.png
If this is not what you need, please clarify further.
-
maitrebart
Re: How to create round corner and drop shadow by convert?
Thank you very much! Moreover you got the idea of my "border" concept. I will study your code and try to finalize it as I wish.
Thank you again for your all your efforts.
Thank you again for your all your efforts.
-
maitrebart
Re: How to create round corner and drop shadow by convert?
Here is what I understood from your first manipulation: (correct me if I'm wrong)fmw42 wrote: [...]
convert cotegaspesie4.jpg -resize 50% cotegaspesie4_sm.jpg
infile1="cotegaspesie4_sm.jpg"
infile2="bkgd_photo.gif"
ww=`convert $infile1 -ping -format "%w" info:`
hh=`convert $infile1 -ping -format "%h" info:`
wwm1=`convert xc: -format "%[fx:$ww-1]" info:`
hhm1=`convert xc: -format "%[fx:$hh-1]" info:`
convert $infile1 \
\( +clone -threshold "100%" -fill white -draw "roundrectangle 1,1 $wwm1,$hhm1 25,25" \) \
-alpha off -compose CopyOpacity -composite \
-background none -compose Over -gravity center -extent ${ww}x${hh} \
\( +clone -background black -shadow 100x5+10+10 \) +swap \
-background none -flatten $infile2 +swap -gravity center -composite \
cotegaspesie4_sm_rounded_bkgd.png
[...]
If this is not what you need, please clarify further.
infile1="cotegaspesie4_sm.jpg"
infile2="bkgd_photo.gif"
Desc: Assign image files
ww=`convert $infile1 -ping -format "%w" info:`
hh=`convert $infile1 -ping -format "%h" info:`
Desc: ww and hh are the width and height of infile1.
wwm1=`convert xc: -format "%[fx:$ww-1]" info:`
hhm1=`convert xc: -format "%[fx:$hh-1]" info:`
Desc: wwm1 and hhm1 are the ww and hh minus 1. (reduced)
1 convert $infile1 \
Desc: - Load infile1 image in a new layer (layer 0).
Result: - Layer 0 (current layer) is the infile1 image.
2 \( +clone -threshold "100%" -fill white -draw "roundrectangle 1,1 $wwm1,$hhm1 25,25" \) \
Desc: - Create a new layer (layer 1) with a copy of layer 0, make it back, and draw a white rounded rectangle
with reduced size. (why?)
Result: - The current layer image (layer 1) is a rectangular white image with black rounded corners with reduced size wrt infile1's.
- Layer 0 is the infile1 image.
3a -alpha off -compose CopyOpacity -composite \
Desc: - Remove alpha channel from the current layer image (layer 1).
- The composition operation will consist in copying each pixel of the source image to the alpha channel of the corresponding pixel in the destination image.
- Apply the composition (for all the pixels) where the source image is the current layer's (layer 1) and the destination image is layer 0's.
Result: - Layer 0 is the reduced infile1 image with transparent rounded corners.
- Layer 1 vanishes. (right?)
- Layer 0 becomes the current layer.
3b -background none -compose Over -gravity center -extent ${ww}x${hh} \
Desc: - Set the background color to transparent.
- The composition operation will consist in ? (my guess: simply overlay the source image on the destination image)
- Set the size of the current layer (layer 0) to the infile1 image's while keeping it centered.
Result: - The current layer image (layer 0) is the infile1 image with transparent rounded corners with the original size.
4 \( +clone -background black -shadow 100x5+10+10 \) +swap \
Desc: - Create a new layer (layer 1) with a copy of the layer 0 image. (Layer 1 is now the current layer)
- Paint it black (but of course it still preserve the transparent rounded corners)
- Add a shadow effect (with offset by +10+10).
- Exchange the image between the 2 layers.
Result: - Layer 0 is now the shadow effect.
- Layer 1 is now the infile1 image with transparent rounded corners (original size).
- Layer 1 is still the current layer.
5 -background none -flatten \
Desc: - Set the background color to transparent. (why?)
- Both layers are rationalized to a single one (layer 0).
Result: - Layer 0 is now the infile1 image with transparent rounded corners with shadow.
- Layer 1 vanishes. (right?)
- Layer 0 becomes the current layer.
6 $infile2 +swap -gravity center -composite cotegaspesie4_sm_rounded_bkgd.png
Desc: - Load infile2 image in a new layer (layer 1) which becomes the current layer.
- Exchange the image between the 2 layers. (Layer 1 is still the current layer which is now the infile1 image with transparent rounded corners with shadow)
- Before the composition begins, the source image will be centerized wrt the destination image.
- Apply the composition (for all pixels) where the source image is the current layer (layer 1) and the destination image is layer 0's (infile2 image).
Result: - Layer 0 is the infile1 image with transparent rounded corners with shadow centered over the infile2 image.
- Layer 1 vanishes. (right?)
- Layer 0 becomes the current layer (which is the one that is saved as cotegaspesie4_sm_rounded_bkgd.png)
Re: How to create round corner and drop shadow by convert?
Hope someone wants to respond to your analysis of the command. 
//Jan
//Jan
-
snibgo
- Posts: 12159
- Joined: 2010-01-23T23:01:33-07:00
- Authentication code: 1151
- Location: England, UK
Re: How to create round corner and drop shadow by convert?
Yes, I think that analysis is about right.
The input image might be 100 pixels wide, so the roundrectangle would start at coordinate 0,0 and end at 99,99. So we need the "minus 1".
I don't know why Fred (fmw42) started at 1,1. Starting at 0,0 seems fine.
Here are my comments on your analysis:
3a -alpha off -compose CopyOpacity -composite \
This disables the alpha channel of the roundrectangle image, so the greyscale channel (instead of the alpha channel) is copied to layer 0.
4 \( +clone -background black -shadow 100x5+10+10 \) +swap \
"Black" is the colour that will be used for the shadow.
5 -background none -flatten \
If you don't change the background from black (the current setting) to transparent, then where the shadow is currently transparent (outside the rounded corners), the image will become black.
Here is a Windows script to do the same. I couldn't download your background for some reason. I have changed the shadow colour to red, to show more clearly what is happening. You probably want to change it back to black.
rem If we don't have a background image, invent one.
if not exist bkgd_photo.gif convert -size 500x500 plasma: bkgd_photo.gif
convert cotegaspesie4.jpg -resize 50%% cotegaspesie4_sm.jpg
set infile1="cotegaspesie4_sm.jpg"
set infile2="bkgd_photo.gif"
convert %infile1% -format "set ww=%%w\nset hh=%%h" info:%TEMP%\getsize.bat
call %TEMP%\getsize.bat
convert xc: -format "set wwm1=%%[fx:%ww%-1]" info:%TEMP%\getsize.bat
call %TEMP%\getsize.bat
convert xc: -format "set hhm1=%%[fx:%hh%-1]" info:%TEMP%\getsize.bat
call %TEMP%\getsize.bat
set rndRad=25
set shadOffset=10
convert %infile1% ^
( +clone -threshold "100%%" -fill white -draw "roundrectangle 0,0 %wwm1%,%hhm1% %rndRad%,%rndRad%" ) ^
-alpha off -compose CopyOpacity -composite ^
-background none -compose Over -gravity center -extent %ww%x%hh% ^
( +clone -background red -shadow 100x5+%shadOffset%+%shadOffset% ) +swap ^
-background none -flatten %infile2% +swap -gravity center -composite ^
cotegaspesie4_sm_rounded_bkgd.png
snibgo's IM pages: im.snibgo.com
-
fmw42
- Posts: 25562
- Joined: 2007-07-02T17:14:51-07:00
- Authentication code: 1152
- Location: Sunnyvale, California, USA
Re: How to create round corner and drop shadow by convert?
Thanks for converting it to windows as that is not my specialtysnibgo wrote:I don't know why Fred (fmw42) started at 1,1. Starting at 0,0 seems fine.
The 1,1 rather than 0,0 came from Anthony's original example that I just modified to avoid the file creation. I don't know why he did that and I did not even give it much thought.
see http://www.imagemagick.org/Usage/thumbn ... ded_border
Looking more carefully he was using strokewidth=3 and needed to adjust the center of the stroked line as per his comment
"The coordinates at which to locate the rectangle is for the exact 'center' of the stroke-width used to define the rectangle (it can be a floating point value). Also it is given in terms of 'pixel coordinates' (see Pixel vs Image coordinates), whcih means that a value of 1,1 refers to the second pixel form the top and left edges, but more imporatantally it refers to the 'center' of the pixel whcih is in reality 1.5 units from the real top and left edges. Now we will use a stoke width (SW) of 3, that makes the image 3 pixels larger on all sides. It then means the retangle will be positioned SW/2 - 0.5 or 1.0 pixels from the top left, and ImageSize + SW*1.5 - 0.5 or Image size + 4 pixels at the bottom right."
So if using only a strokewidth of 1, then 0,0 would be fine.
I was not very careful about those considerations that Anthony presented above, which will affect the 1,1 and the ww-1,hh-1 as those will be dependent upon the stroke width if one wants to be as precise as Anthony. He is also using image coordinates vs pixel coordinates. The former have 0,0 at the top left corner of the pixel 0,0 square and w,h at bottom right corner of the w,h pixel square.
Last edited by fmw42 on 2010-02-12T10:36:04-07:00, edited 4 times in total.
-
snibgo
- Posts: 12159
- Joined: 2010-01-23T23:01:33-07:00
- Authentication code: 1151
- Location: England, UK
Re: How to create round corner and drop shadow by convert?
If my brain was in gear, I would have seen that the four Windows lines:
can be simplified to:
Code: Select all
convert xc: -format "set wwm1=%%[fx:%ww%-1]" info:%TEMP%\getsize.bat
call %TEMP%\getsize.bat
convert xc: -format "set hhm1=%%[fx:%hh%-1]" info:%TEMP%\getsize.bat
call %TEMP%\getsize.batCode: Select all
set /A wwm1=%ww%-1
set /A hhm1=%hh%-1
snibgo's IM pages: im.snibgo.com